Sending and Receiving Faxes
You can send and receive faxes even without a physical fax machine. If you have one, you can connect it to Cloud PBX.
Connecting a Physical Fax Machine
If you have a fax machine, you can connect it to Сloud PBX and retain the previous fax functionality. Create an employee for the fax, connect the fax machine to a VoIP gateway, and configure an account on the VoIP gateway to work with the fax.
Receiving Faxes Without a Fax Machine
You can receive faxes even without a fax machine. Depending on how often you need to receive faxes, choose one of the following connection options:
- Set up a phone number for your fax.
- Offer the option to send a fax during off-hours.
- Make faxing one of the options in an IVR.
Let's consider each of these options.
Phone Number for Faxing
To permanently connect faxing to a phone number, go to the Numbers section. Select the Around the clock option and configure one of the numbers to work with the fax.
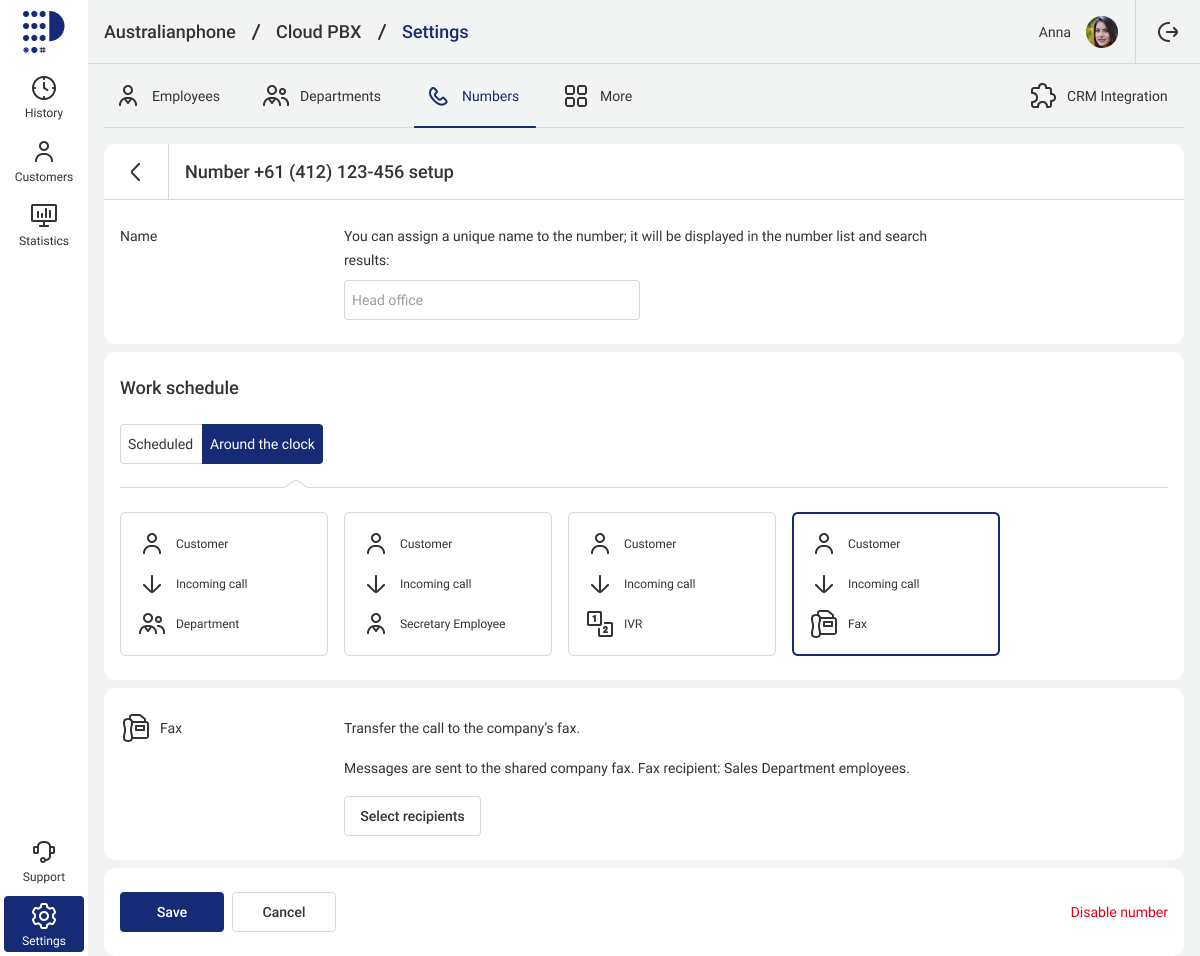
When calling such a number, you will hear a fax signal.
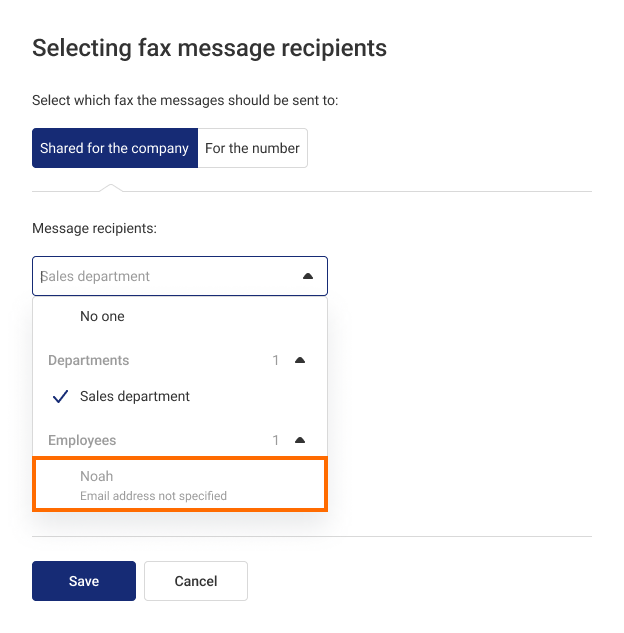
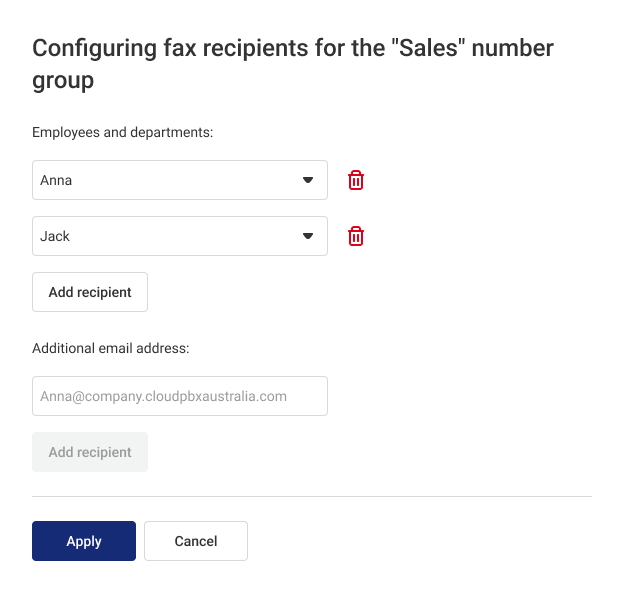
In the Fax section, click the Select recipients button. In the window that appears, choose which fax should receive the messages:
- Shared for the company: Voice messages will be delivered to all recipients of a shared company fax.
- For the number: Messages will be delivered only to the recipients you specify for that number.
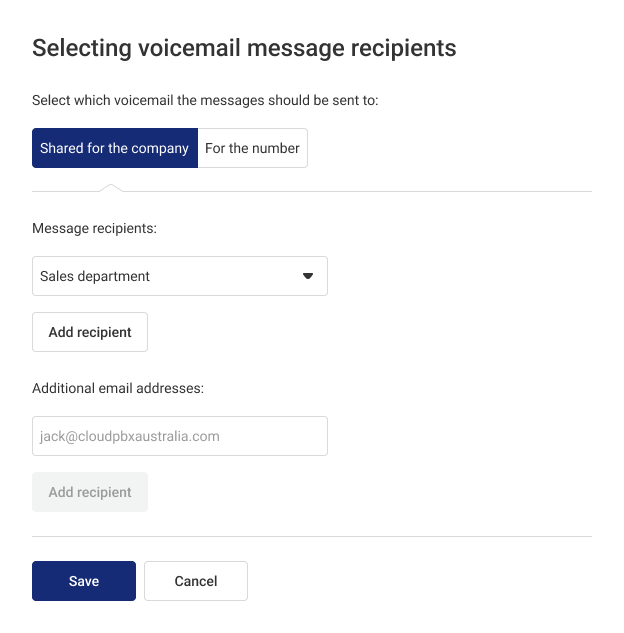
If you select a department instead of an employee in the recipient list, faxes will be sent to the email addresses of all employees in that department.
If you want to send faxes to an external email address, enter it in the corresponding field below.
If an employee's profile does not contain an email address, you can’t select them as a fax recipient. Cloud PBX will notify you of this.
Please note
You can set different fax settings for each work schedule and menu level. To apply the same fax settings everywhere, select the Shared for the company tab in the recipient settings.Faxing During Off-Hours
Select Scheduled in the Numbers section and choose to forward incoming calls to the fax in the During off-hours tab.
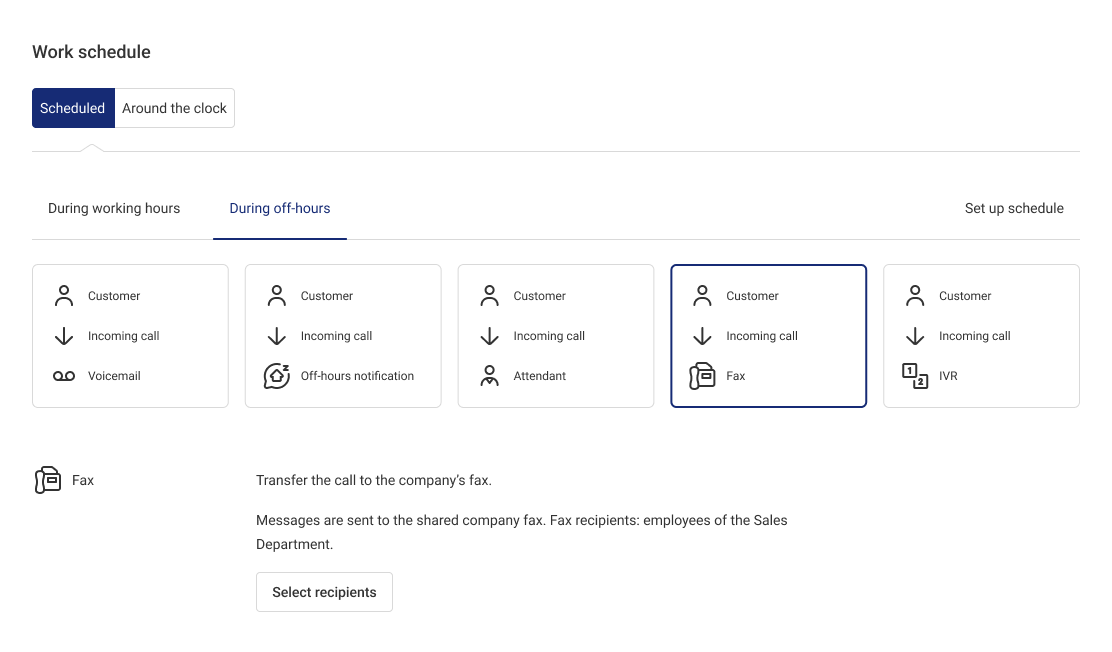
Set up the recipients the same way as when connecting a fax to a specific phone number.
Faxing as an Option in an IVR
Select the Around the clock work schedule and an IVR as a call distribution option. Connect the fax to one of the IVR buttons.
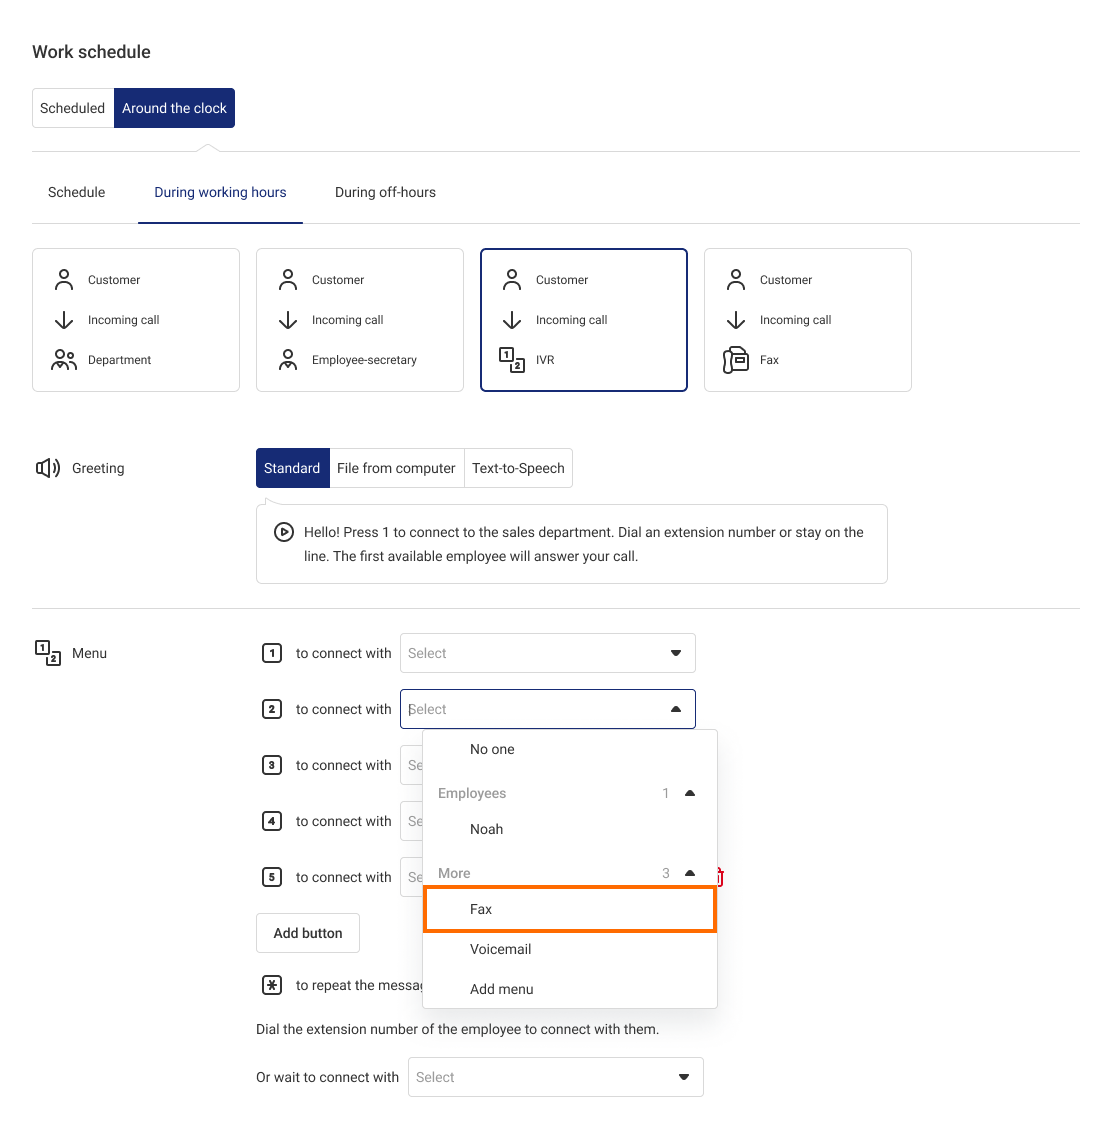
Select the fax recipients. They are set up the same way as in the Numbers section.
Sending Faxes Without a Physical Fax Machine
You can send a fax without a fax machine via the Cloud PBX softphone.
1. Enter a fax number in the Dial section.
2. Select Send fax instead of Call.
3. A file selection window will appear. Choose the file you want to send (in pdf, tif, tiff, jpg, jpeg, or png formats) and click Open.
Where to View All Fax Settings
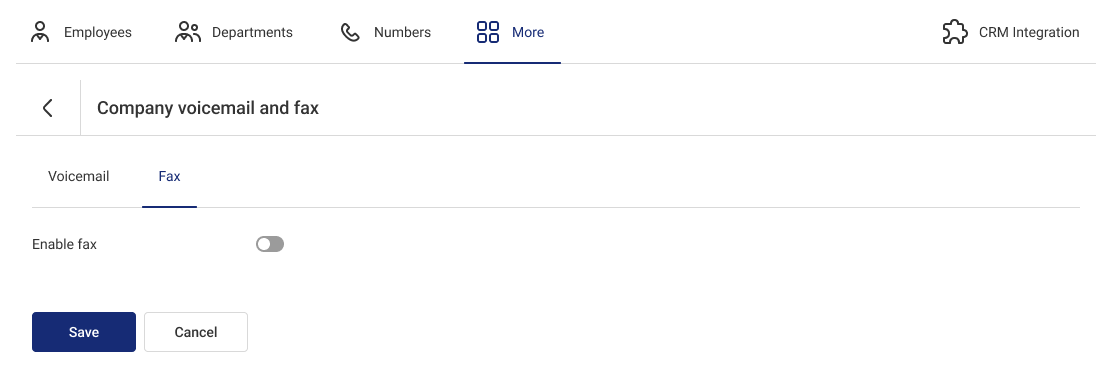
To view the settings for all company faxes, go to Settings — More — Company Voicemail and Fax — Fax tab.
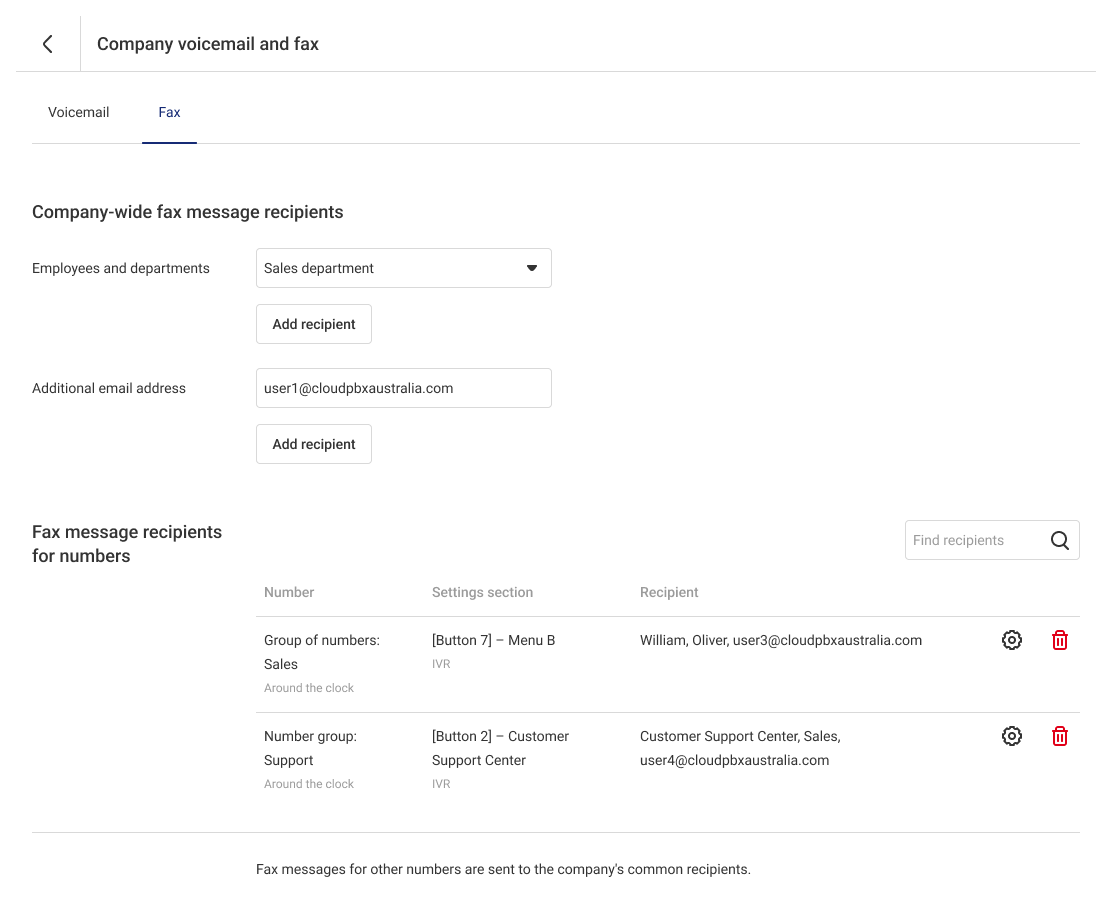
In this section, in addition to the shared company fax settings, you can change the fax recipients for selected numbers. To do so, click the gear icon next to the chosen number. In the open window, you can add or remove fax recipients and specify additional email addresses to which faxes should be sent.
To delete the fax settings for a number, go to the Fax recipients section and click the trash bin icon next to the number.
Please note
After deleting the fax settings for a number, any messages left on that number will be sent to the recipients of the shared company fax. You can create a new fax number and set up call forwarding to fax only in the Numbers section.How to Disable Faxing
If you don’t use fax, you can disable it by following these steps:
1. Go to the Numbers section.
2. Find the numbers set up for fax reception and click the gear icon.
3. For each work schedule, select a new call distribution option.
4. Go to More — Company Voicemail and Fax — Fax.
5. Toggle the switch to Off and click Save.
Once disabled, the fax option will be removed from the standard greeting on all your numbers.
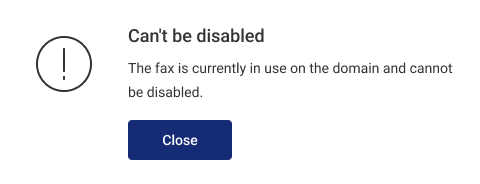
Please note
If you don’t disable fax on all numbers, an error message will appear. In this case, go back to the Numbers section and check which numbers still have fax enabled.