Voicemail
There are situations when none of the employees can answer the call, but this is not a reason to lose customers. Use voicemail so that a customer can ask a question or make a request even during off-hours of the company or during an employee's vacation, or when an employee simply does not answer for a long time.
You can set up a shared voicemail for the entire company, as well as individual voicemails for each number, department, employee and even IVR level. Below we will tell you more about voicemail settings.
Voicemail for Off-hours
To avoid losing potential customers during off-hours, set up receiving calls to voicemail through the Numbers section.
1. Go to the Shared Company Numbers tab.
2. Select the number for which you want to set up an off-hours voicemail.
3. Set the operating mode to Scheduled.
Set up a schedule for the number and select the Voicemail route for off-hours. The IVR settings with a voicemail will open below.
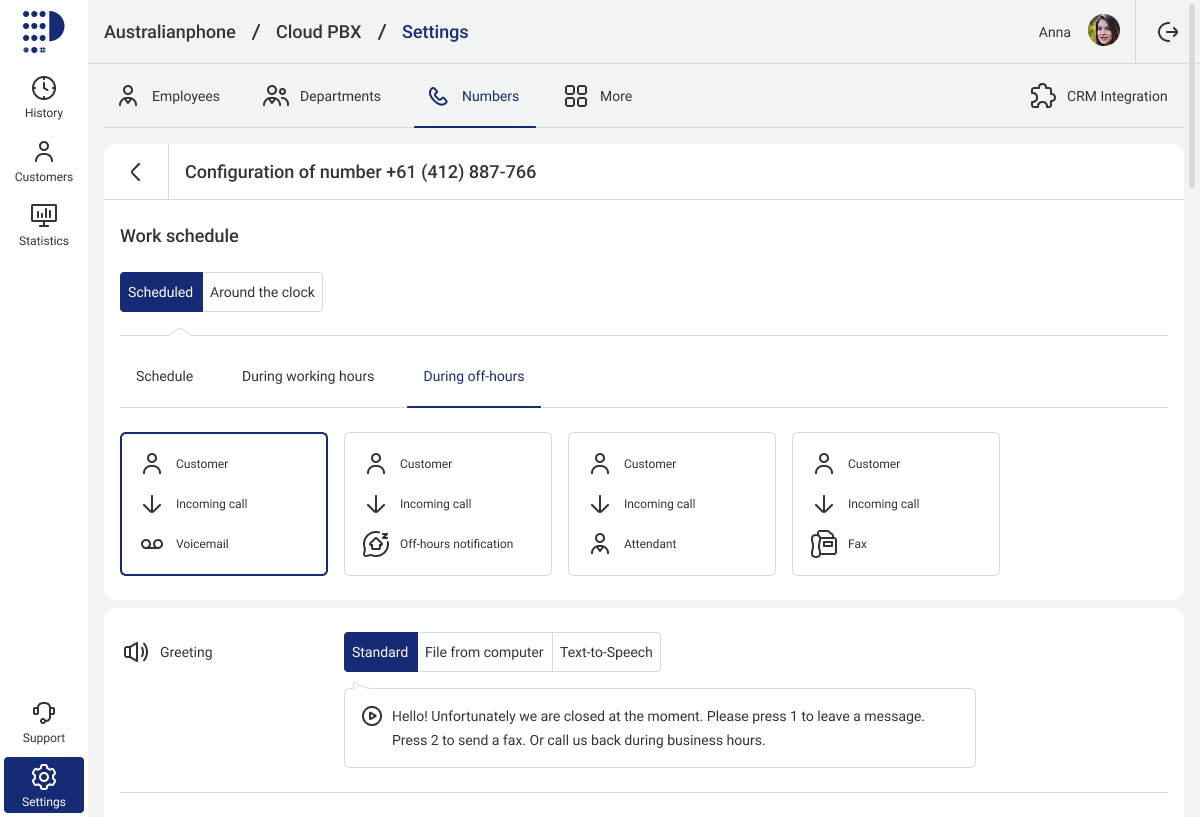
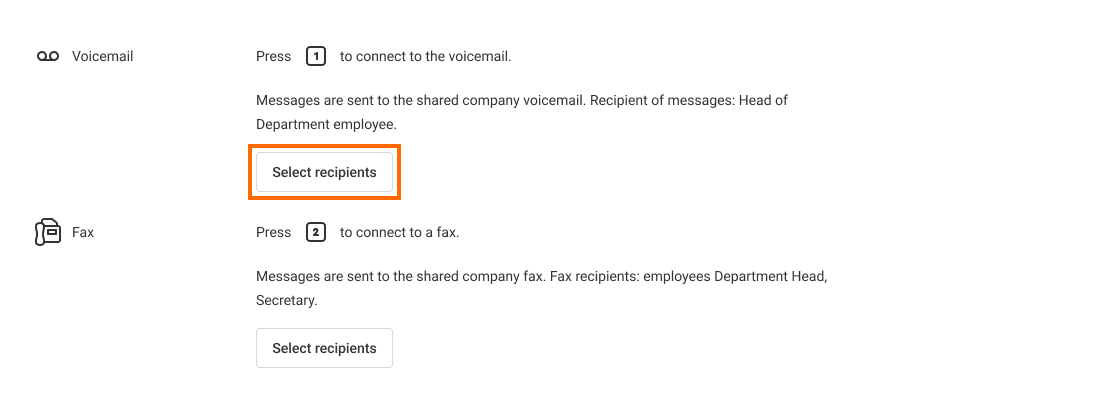
4. By default, when you press button 1, the call will be routed to the shared company voicemail. To change your voicemail settings, click Select recipients.
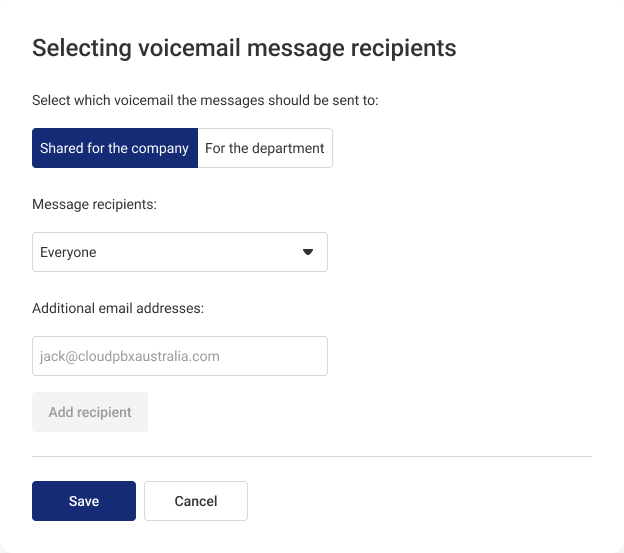
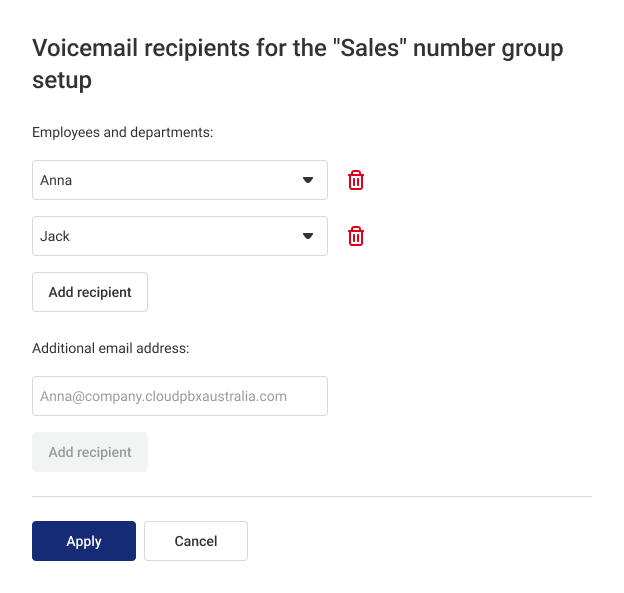
5. In the appeared window, select which voicemail the messages should be sent to:
- Shared for the company — voice messages will be sent to all recipients of messages of the shared company voicemail;
- For the menu level — messages will only be sent to the recipients specified for the selected menu level.
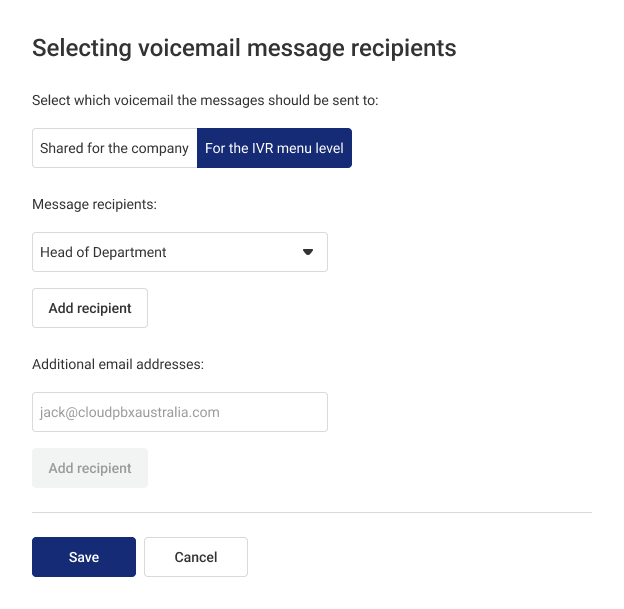
If you select not a specific employee, but a department in the recipients list, then voice messages will be sent to the email addresses of all employees of this department who have an email address in their profile.
If you want to send voice messages to an additional email address, please enter it in the corresponding field below.
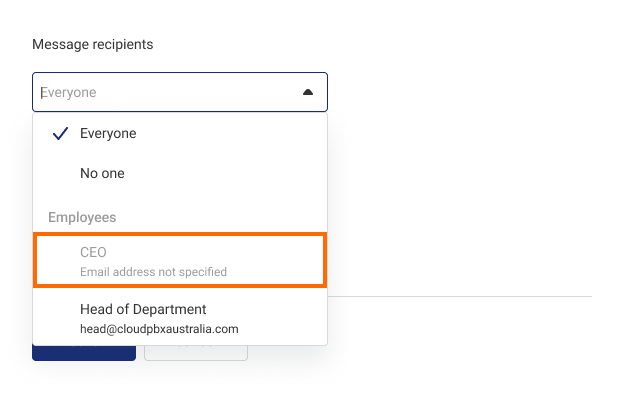
Please note
If an employee's profile does not have an email address, you will not be able to select them as a voicemail message recipient. Cloud PBX will warn you about it.
6. Click Save.
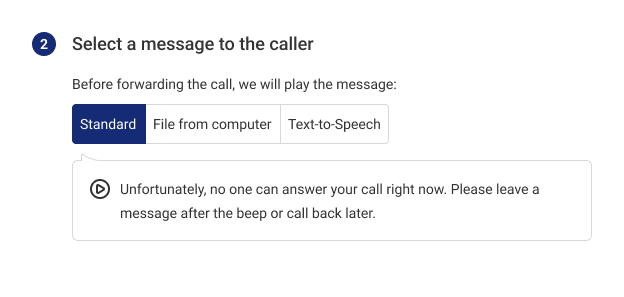
By default, Cloud PBX will play a standard message asking the customer to leave a voicemail, but you can replace it at any time with your own file from your computer or voice the text of the message for your voicemail using the Text-to-Speech function.
Voicemail in the IVR
In order not to lose customers who are not ready to figure out the IVR,you can invite them to leave a message to the voicemail at any IVR menu level.
To do this, in the IVR settings, specify that when pressing one of the buttons, the call will be forwarded to a voicemail.
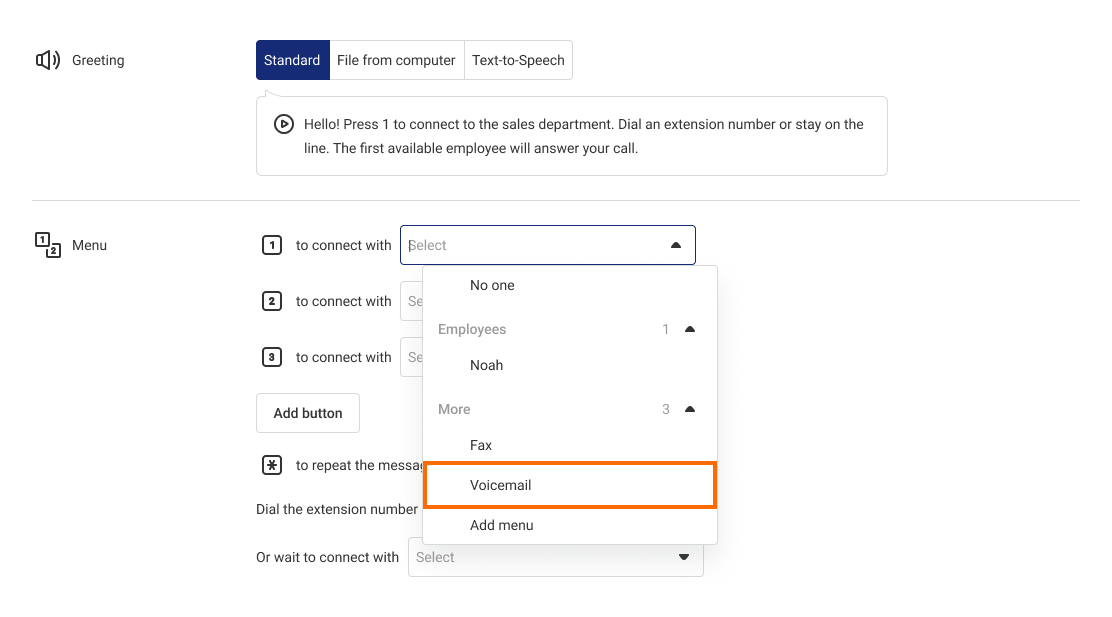
When selecting a voicemail from the drop-down list, a settings window will automatically open similar to the one that appears when you select recipients for off-hours voicemail messages.
Please note
At each IVR menu level, you can set up your own voicemail with a unique recipients list.Voicemail for a Long Response Time in a Department
In department settings, find the If no one answers section. Select the Suggest leaving a message to voicemail or calling back later option.
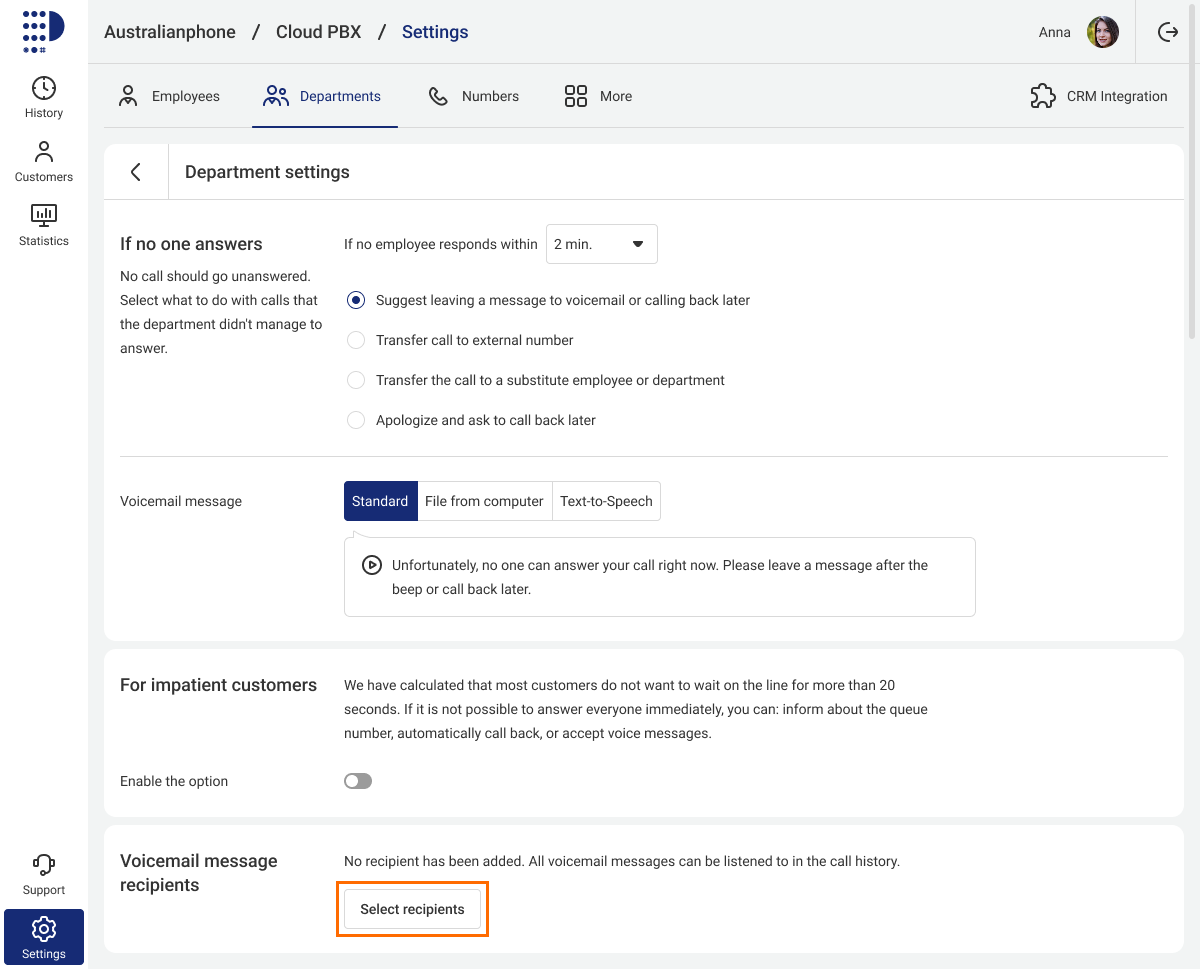
By default, the shared company voicemail with the previously set up recipient list will be selected. To change the voicemail settings, in the Voicemail message recipients section, click the Select recipients button.
Select which voicemail the messages should be sent to: a shared company voicemail or a department voicemail. Department voicemail recipients are set up the same way as the IVR menu level voicemail recipients.
Where Can I See All Departments and Numbers Voicemail Settings
To see the settings for all departments and numbers voicemails, go to Settings — More — Company Voicemail and Fax — the Voicemail tab. The settings for the shared company voicemail are also located here.
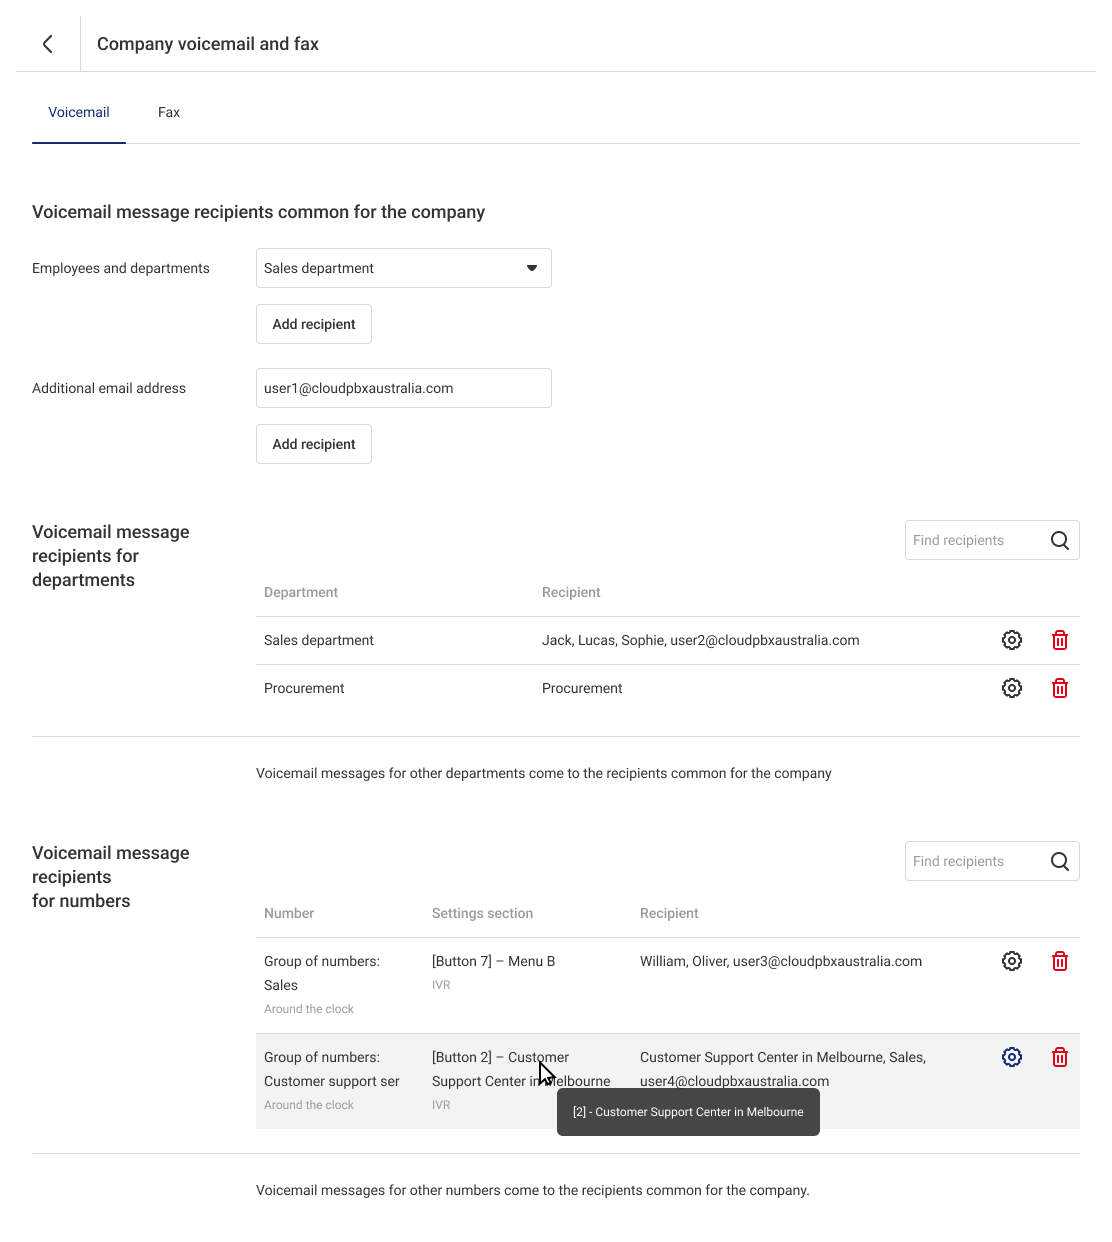
To change the settings, click the gear icon to the right of the selected number. In the window that opens, you can add or delete voicemail recipients, as well as specify additional emails to which voice messages will be sent.
To delete voicemail settings, in the Company Voicemail and Fax section, click the trash can icon to the right of the number or department for which the voicemail is set up.
Please note
After deleting the voicemail settings for a number or department, voice messages left to this voicemail will be sent to the shared company voicemail. You can create a new voicemail for a number or department only in the numbers and departments settings.Employee’s Voicemail
To avoid losing direct customer calls to employees’ extension numbers and corporate SIM cards, set up forwarding of such calls to voicemail. To do this, go to the Employees section and click on the name of the employee of interest. In the profile settings, you can set up forwarding to voicemail during an employee’s vacation, off-hours and working hours when waiting for a response for a long time.
Setting up Forwarding to Voicemail if an Employee does not Answer for a Long Time
1. In the Receiving calls section, under the If the employee doesn't respond subheading, click the Set up button.

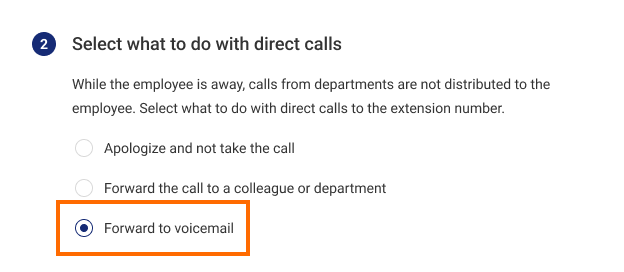
2. Select what to do if an employee does not answer — Forward to voicemail.

3. To set up voicemail message recipients, click Select recipients.
4. Select the message that will be played to a caller before being forwarded to voicemail.
5. Check your forwarding settings. If everything is correct, click Apply, and then save your profile settings at the bottom of the page.
Setting up Forwarding to Voicemail During Off-hours
1. In the Receiving Calls section under the Schedule subheading, click the Set up button.

2. Choose how the employee works. Forwarding direct calls to voicemail is available for all kinds of schedules except the Around the clock one.
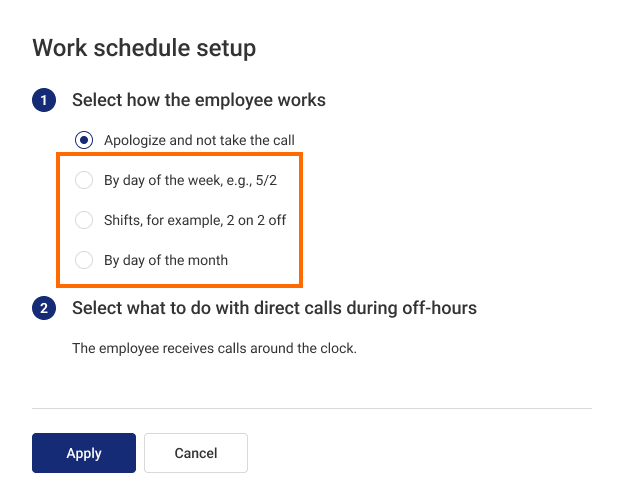
In the appeared menu, specify working days and working hours. For details about schedule settings, see the Employee’s personal schedule article .
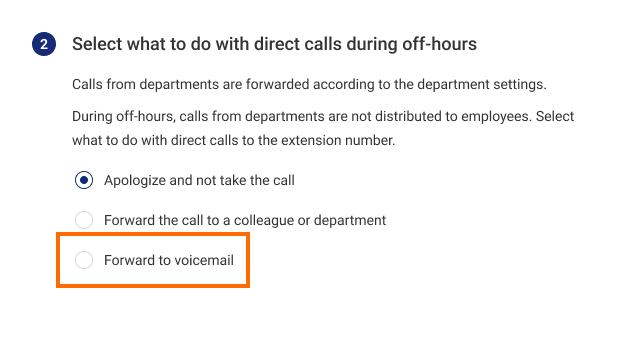
3. When setting up actions for direct calls during off-hours, select Forward to voicemail.
4.Save the personal schedule settings, check them, and then save the profile settings at the bottom of the page.
Voicemail message recipients are set up in the same way as described in the “Setting up forwarding to voicemail if an employee does not answer for a long time” paragraph.
Setting up Forwarding to Voicemail During an Employee’s Vacation or Absence
1. In the Receiving calls section, under the Vacation or absence subheading, click on the Set up button.

2. In the appeared menu, select the employee’s period of absence. For details about these settings, see the Forwarding calls during an employee’s vacation or absence article.
3. Enable forwarding of direct calls for the selected period to voicemail:
Voicemail message recipients are set up the same way as described in the Setting up forwarding to voicemail if an employee does not answer for a long time paragraph.
4.Save the vacation or absence settings, check them, and then save the profile settings at the bottom of the page.
Voicemail for Internal Calls
If you have employees for whom it is particularly important not to miss internal calls from colleagues from other departments (system administrators, accounting, etc.), you can set up a voicemail for such calls.
To enable the voicemail for internal calls, please contact support.
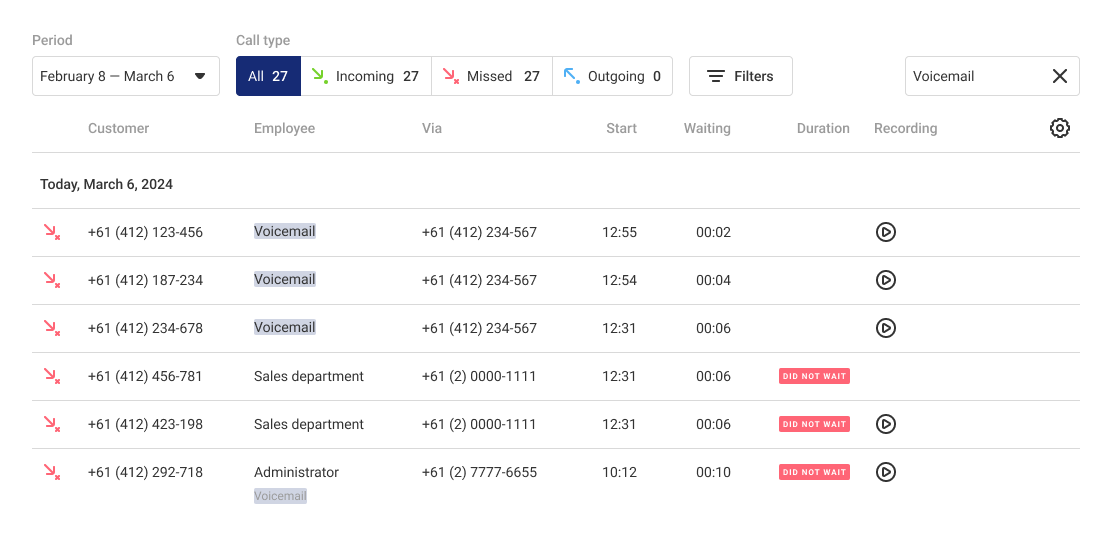
How Can I Listen to Voicemail Messages?
To see all messages left in the voicemail, in Call History, type Voicemail in the search bar:
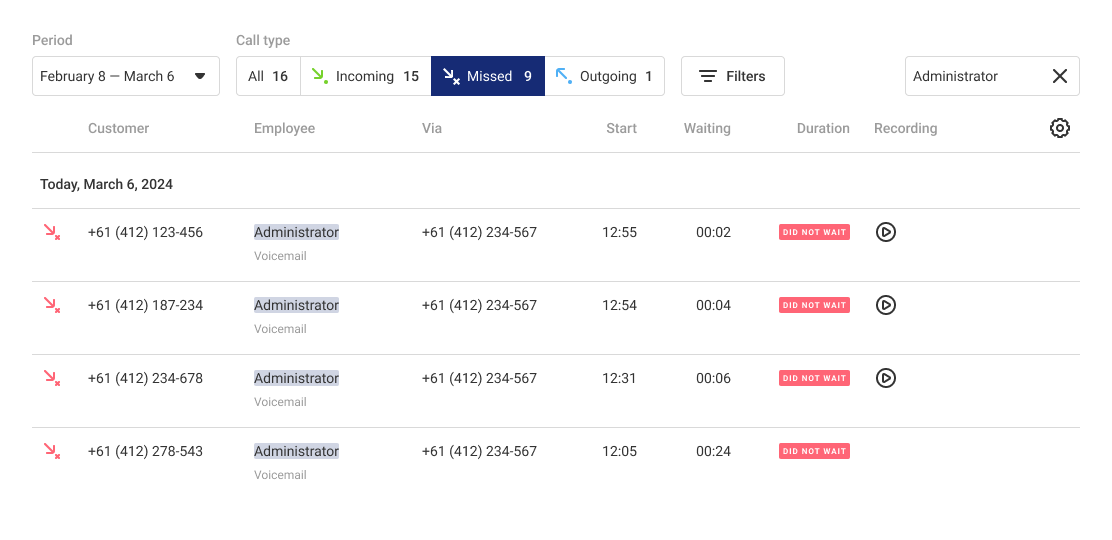
If you want to find all messages left to voicemail for a specific employee, type their name in the search bar and select the Missed call type.
If you are specified as a recipient of voicemail messages, after a customer or employee leaves a voicemail, you will receive an email with a link to listen to the voicemail. The link to the voicemail will be available for 7 days from the date of receiving the email.

An email with a voice message from a customer may begin like this:
- The customer left a voice message for the number, if the message was left for the shared company number during off-hours or in the IVR.
- The customer left a voice message for the employee, if the message was left either for the employee's or the secretary employee’s extension number.
- The customer left a voice message for the department, if the message was left for the department’s extension number.
An email with a voice message from an employee may begin like this:
- The employee left a voice message for the number, if the message was left for the shared company number.
- The employee left a voice message for the employee, if the message was left for the employee's extension number.
- The employee left a voice message for the department, if the message was left for the department’s extension number.